- Like
- Digg
- Del
- Tumblr
- VKontakte
- Flattr
- Buffer
- Love This
- Odnoklassniki
- Meneame
- Blogger
- Amazon
- Yahoo Mail
- Gmail
- AOL
- Newsvine
- HackerNews
- Evernote
- MySpace
- Mail.ru
- Viadeo
- Line
- Comments
- Yummly
- SMS
- Viber
- Telegram
- Subscribe
- Skype
- Facebook Messenger
- Kakao
- LiveJournal
- Yammer
- Edgar
- Fintel
- Mix
- Instapaper
- Copy Link
Want to grow one of the best natural healers that bloom with the wisdom of ancient remedies? Here’s How to Grow Anachuvadi Plant.
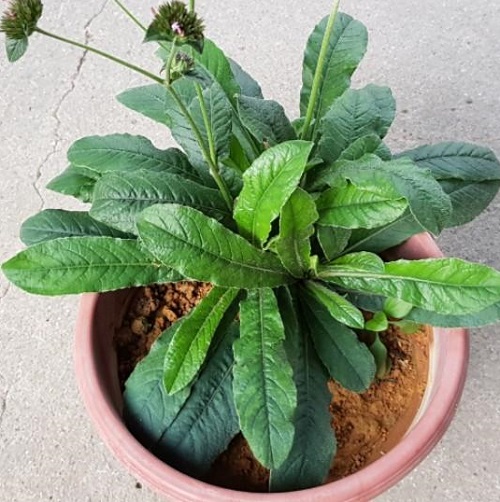
Commonly known as Elephant’s Foot or Prickly Elephant’s Foot, it is a perennial herbaceous plant that belongs to the Asteraceae family. It is native to tropical and subtropical regions of Asia, Africa, and the Americas. Here is a complete guide about How to Grow Anachuvadi Plant.
Anachuvadi Plant Information
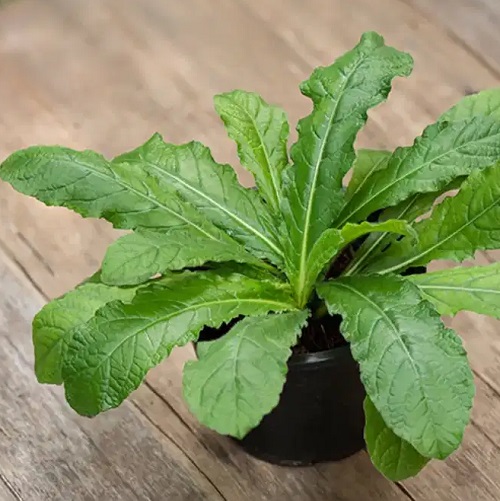
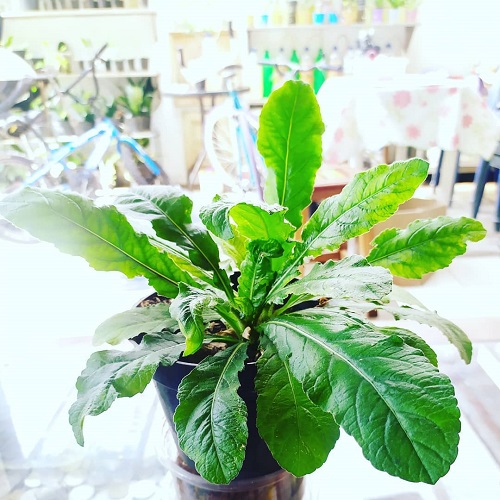
Anachuvadi Plant typically grows up to 30-60 cm. It has a woody base, from which arise multiple stems covered with stiff hairs. The leaves are simple, alternate, and clustered at the base of the plant. They are broad, ovate to lanceolate in shape, with toothed or serrated margins. The upper surface of the leaves is dark green, while the lower surface is pale and covered in soft hairs.
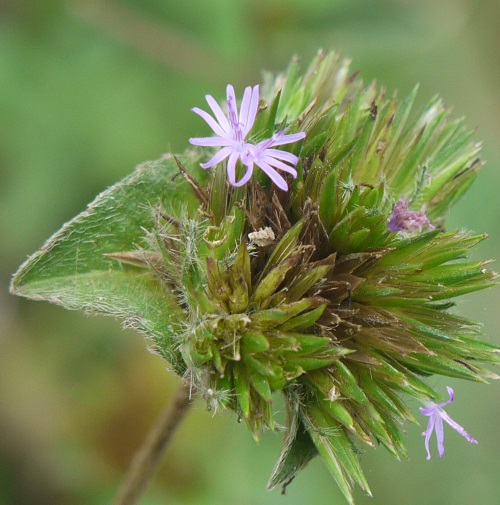
The Anachuvadi Plant produces small flowers arranged in dense, rounded clusters called capitula. Each capitulum consists of many tiny tubular flowers surrounded by bracts. The flowers can be white, pale pink, or lavender in color. While these plants have been traditionally used for medicinal purposes, consulting a healthcare professional before using them for medical treatments is essential.
Botanical Name: Elephantopus scaber
Common Names: Prickly leaved elephant’s foot Aanayadi, Aanachuvadi, Aanayadiyan, Koonjirikka, Ottaveran, Thomunji.
The Anachuvadi plant is referred to by various common names in different Indian languages. Here are some of them:
Hindi: Jangli Arandi
Tamil: கண்டுகொண்டை ஆமணக்கு (Kandu Kondai Aamanakku)
Telugu: పంట దమ్ముదు (Panta Dammudu)
Kannada: ಕುಸುಂಬ (Kusumba)
Malayalam: വാമാന (Vamana)
Marathi: वांझवा (Vanzhava)
Bengali: কাস্তুরী দীপ (Kasturi Deep)
Gujarati: જંગલી એરંદી (Jangali Arandi)
Oriya: ବରୁଆ (Barua)
Punjabi: ਜੰਗਲੀ ਅਰੰਦ (Jangli Arand)
How to Grow Anachuvadi Plant
To grow the Anachuvadi Plant from seeds, you can follow these general steps:
- Collect seeds from mature Anachuvadi Plant. Look for dried flower heads or capitula that have turned brown and are starting to open up. Gently shake the heads to release the seeds into a container.
- Clean the seeds by removing any debris or plant material. You can gently rub the seeds between your fingers or use a fine sieve. This helps ensure better germination rates.
- Some seeds benefit from a period of cold stratification to break dormancy and improve germination. To stratify the seeds, place them in a sealed plastic bag with a moistened paper towel and refrigerate them for about 4-6 weeks. Check the moisture level periodically to prevent mold growth.
- Prepare a well-draining potting mix by combining equal parts of peat moss, perlite, and vermiculite. Fill seed trays or small pots with the potting mix, leaving a little space at the top.
- Once the seedlings have grown a few inches tall and have developed several leaves, Anachuvadi Plant can be transplanted into larger pots or directly into the garden. Choose a location with well-draining soil and full to partial sunlight.
- Water the Anachuvadi Plant regularly, especially during dry periods, but avoid overwatering. If needed, support or stake the plants to prevent them from bending or breaking. Remove any weeds around the plants to reduce competition for nutrients.
- Depending on the purpose of cultivation, you can harvest the leaves or flowers when they are mature and in their prime. Leave a few flowers to seed if you want to collect seeds for future planting.
Read How to Grow Kesavardhini Plant Easily in the Garden here
Requirements to Grow Anachuvadi Plant
Sunlight
Anachuvadi Plant thrives in full sunlight, meaning it should receive at least 6-8 hours of direct sunlight daily. However, it can also tolerate partial shade, especially in hot climates where it may benefit from some protection from intense afternoon sun.
Soil
This plant prefers well-draining soil with a slightly acidic to neutral pH level. A loamy soil enriched with organic matter works best. Good drainage is crucial, as the plant may suffer from root rot in overly wet or waterlogged soil.
Water
Anachuvadi Plant requires regular watering to keep the soil consistently moist. Water the plant when the top inch of the soil feels dry. Be careful not to overwater, as excessive moisture can lead to root rot.
During heavy rainfall or high humidity, it’s important to ensure proper drainage to prevent waterlogging.
Temperature
They prefer warm temperatures. It can tolerate various temperatures but thrives at 20-30°C. It is sensitive to extreme hot or cold temperatures, so it’s best to protect Anachuvadi Plant or bring it indoors during the extreme temperatures.
Anachuvadi Plant Care
Fertilizer
Organic compost or well-rotted manure can also be incorporated into the soil before planting to improve fertility. Anachuvadi Plant generally don’t require heavy fertilization.
However, you can apply a balanced, slow-release fertilizer during the growing season to provide some nutrients. Follow the manufacturer’s instructions for application rates.
Pruning
Pruning is not typically necessary for this plant. However, if you notice any dead or diseased leaves or flowers, you can remove them to maintain the Anachuvadi Plant health and appearance. Regular deadheading can also encourage continuous blooming.
Pests and Diseases
Anachuvadi Plant is generally resistant to pests and diseases. However, some common pests that may occasionally affect the plant include aphids, spider mites, and whiteflies. Monitor your plants regularly and take appropriate measures if you notice any pest infestation, such as using organic insecticidal soap or neem oil.
Disease-wise, the plant can occasionally be susceptible to fungal infections, especially in humid conditions or if the soil is consistently wet. To prevent such issues, ensure good air circulation around the Anachuvadi Plant, avoid overwatering, and water at the base of the plant rather than overhead.
Check Out How to Grow Solanum Nigrum here
- Like
- Digg
- Del
- Tumblr
- VKontakte
- Flattr
- Buffer
- Love This
- Odnoklassniki
- Meneame
- Blogger
- Amazon
- Yahoo Mail
- Gmail
- AOL
- Newsvine
- HackerNews
- Evernote
- MySpace
- Mail.ru
- Viadeo
- Line
- Comments
- Yummly
- SMS
- Viber
- Telegram
- Subscribe
- Skype
- Facebook Messenger
- Kakao
- LiveJournal
- Yammer
- Edgar
- Fintel
- Mix
- Instapaper
- Copy Link