- Like
- Digg
- Del
- Tumblr
- VKontakte
- Flattr
- Buffer
- Love This
- Odnoklassniki
- Meneame
- Blogger
- Amazon
- Yahoo Mail
- Gmail
- AOL
- Newsvine
- HackerNews
- Evernote
- MySpace
- Mail.ru
- Viadeo
- Line
- Comments
- Yummly
- SMS
- Viber
- Telegram
- Subscribe
- Skype
- Facebook Messenger
- Kakao
- LiveJournal
- Yammer
- Edgar
- Fintel
- Mix
- Instapaper
- Copy Link
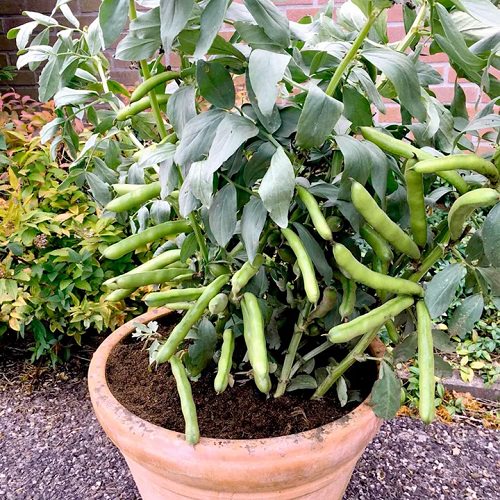
Lima beans are nutritious and tasty! It is also an excellent plant for newbie gardeners. Explore How to Grow Chikkudukaya Plant!

Chikkudukaya plant is a leguminous vine crop of India, which is specially cultivated for its green pods known as ‘sem’. The green pods encapsulating beans inside are consumed as vegetables, whereas, beans are eaten as pulses in India. Chikkudukaya benefits are numerous like it is rich in Vitamin A, B, K, and is good for digestion and weight loss. Beans plants are also known for their nitrogen fixation in the soil, hence it naturally elevates nitrogen level in the soil. Let’s have a look at How to Grow Chikkudukaya Plant!
Chikkudukaya Scientific Name: Lablab purpureus
Chikkudukaya Meaning in English: Broad Beans, Kidney Beans
Other Names: Ballar, Sem, Seim bean, Lablab bean, Kidney bean, Indian bean, Bataw, Broad beans, Lima Bean, Hyacinth bean, Bonavist bean/pea, Dolichos bean, Egyptian kidney bean, Indian bean, Australian pea
Popular Varieties: Nambiar, CO1, Pusa sem1, Pusa sem2, Rajni, Pusa early prolific
How to Grow Chikkudukaya Plant?
The plant is mainly cultivated through seed propagation. For the very purpose, buy seeds from a local seed supplier. You can either start seeds indoors in a seed tray. However, it is better to directly sow them in the ground. The sowing can be done from August to September.
Outdoor Sowing
The very first step is to prepare the land by removing any debris or weeds. Then, amend the soil with finely decomposed cow dung manure or compost. Alternatively, you can create a compost trench, 1 month before the sowing period. Just dig 1-foot soil, where you will sow seeds and fill the space with kitchen vegetable scraps and chikkudukaya leaves. Cover it with soil and till sowing time, the land will be ready.
Now, plow the soil 2-3 times and sow the Chikkudukaya seeds 2-inches deep in the soil. Keep 4-6 inches distance between seeds. Water them just after sowing. The seeds will germinate and sprout within 7-14 days.
Indoor Sowing
You can initially germinate seeds indoors, using a seed tray or small container, then transplant it later. Fill the tray with potting mix and sow seeds. After a light misting with water, cover the tray with plastic for faster germination.
Keep it at room temperature. Within 2 weeks, the seeds will sprout, then later you can transplant the seedlings to the garden.
Chikkudukaya Growing Requirements
Soil
Chikkudukaya prefers well-draining, fertile soil. Loamy-sandy soil is considered ideal but avoid clay soil. The plant prefers neutral to slightly alkaline soil ranging from 6 to 8 pH. If your garden soil is clay, then amend it with coarse sand or start your seeds indoors using a seed tray filled with potting mix.
Temperature
The plant flourishes well in tropical to subtropical regions. It is a cool-season crop, hence it is sown from July till September. The ideal temperature is from 15-18° C, but it can tolerate as low as 10° C and as high as 24° C temperature.
Water
It prefers slightly consistent moist soil, especially during the pod formation period, but not waterlogged. Water the plant just before the soil looks completely dry. Water it according to climate. Like during winters, water it at a one-week interval and lower this rate further during rainy days.
But, for potted seedlings, check the consistency by poking one and a half inches finger in the soil.
Sunlight
Provide 5-6 hours of full sunlight to the plant and it will reward you with abundant prolific yield. But, germination of seeds does not require sunlight nurturing, it can sprout even in shade.
Chikkudukaya Plant Care

Fertilizer
Prior to the sowing or planting the seedlings in the ground, prepare the soil by adding an ample amount of decomposed cow dung manure or compost. Since chikkudukaya is a legume plant and known for its nitrogen-fixing tendency, you can use low nitrogen content fertilizer like 5-10-10 during flowering.
Support
Chikkudukaya is a vine and has a trailing growth habit. So, install stakes or trellis and tuck the vine on it so that it can climb and produce beans.
Note: Since beans produce nitrogen in the soil, it gives you an added perk of intercropping, where two or more plants flourish together and support each other in growth. You can consider bajra and maize for the intercropping. They will also protect the vine from strong winds. Check out our three sister garden design article for details.
Pests and Diseases
The plant is susceptible to insects and pests like bean beetles, and aphids. So, to get rid of them, use a strong jet of water near the infected areas. It is better not to use chemical pesticides. You can either spray neem oil solution or apply a diluted soap solution. Make sure to eliminate infected parts from the plant.
Explore How to Grow Avarampoo Plant here
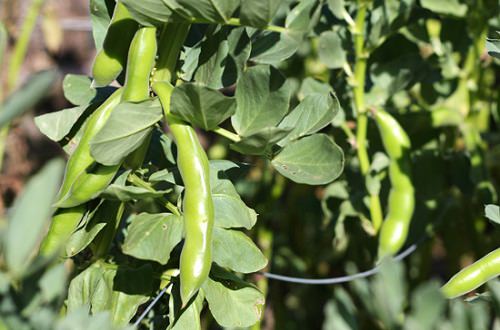
Harvesting
The beans are ready to harvest after 3-4 months from sowing. Chikkudukaya pods and beans can be harvested from winter (November) till spring. Just handpick them, when they are young and slender. Do not let them stay on the plant for prolong period, otherwise, they will become tough and sturdy. But, you can leave some beans to ripen out completely on the plant. Then, you can bring them inside, and dry at any well-aerated area for storage purposes.
- Like
- Digg
- Del
- Tumblr
- VKontakte
- Flattr
- Buffer
- Love This
- Odnoklassniki
- Meneame
- Blogger
- Amazon
- Yahoo Mail
- Gmail
- AOL
- Newsvine
- HackerNews
- Evernote
- MySpace
- Mail.ru
- Viadeo
- Line
- Comments
- Yummly
- SMS
- Viber
- Telegram
- Subscribe
- Skype
- Facebook Messenger
- Kakao
- LiveJournal
- Yammer
- Edgar
- Fintel
- Mix
- Instapaper
- Copy Link
Chettu jaathi chikkuddu seeds akkada dorukutaaye how to get seeds