- Like
- Digg
- Del
- Tumblr
- VKontakte
- Flattr
- Buffer
- Love This
- Odnoklassniki
- Meneame
- Blogger
- Amazon
- Yahoo Mail
- Gmail
- AOL
- Newsvine
- HackerNews
- Evernote
- MySpace
- Mail.ru
- Viadeo
- Line
- Comments
- Yummly
- SMS
- Viber
- Telegram
- Subscribe
- Skype
- Facebook Messenger
- Kakao
- LiveJournal
- Yammer
- Edgar
- Fintel
- Mix
- Instapaper
- Copy Link
This article will guide you into making the perfect Anthurium Potting Mix that will ensure your plants get the right nutrition!
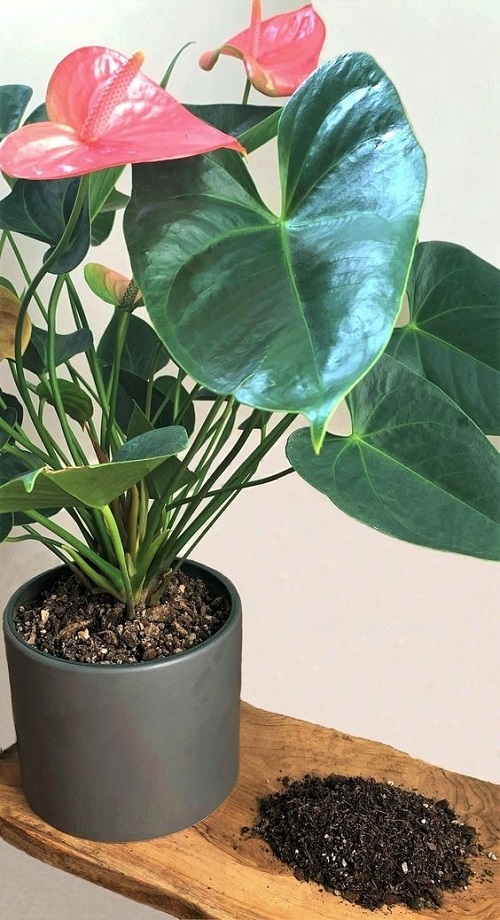
Creating a suitable Anthurium Potting Mix is essential for the successful growth and development of Anthurium plants. These tropical beauties are popular for their vibrant flowers and glossy foliage, but to ensure their longevity and health, it’s crucial to provide them with a well-balanced growing medium. Anthura potted anthuriums are a popular choice due to their high-quality breeding and variety of colors. These professionally grown potted plants are already established and ready to flourish in your home or garden. In this blog post, we will guide you through the process of making an ideal growing medium.
Understanding Anthurium Plant Requirements
Before we dive into the details of creating an Anthurium potting mix, it’s important to understand the specific requirements of these plants. Anthuriums prefer well-draining soil that retains moisture without becoming waterlogged.
These plants thrive in a loose, well-aerated medium, as this allows their roots to breathe and prevents the risk of root rot. Additionally, Anthuriums benefit from a balanced blend of organic matter and inorganic materials to provide them with necessary nutrients.
Explore How to Make Potting Soil at Home in India here
Ingredients for a Perfect Anthurium Potting Mix
To create a perfect potting mix for Anthurium plant, you will need the following ingredients:
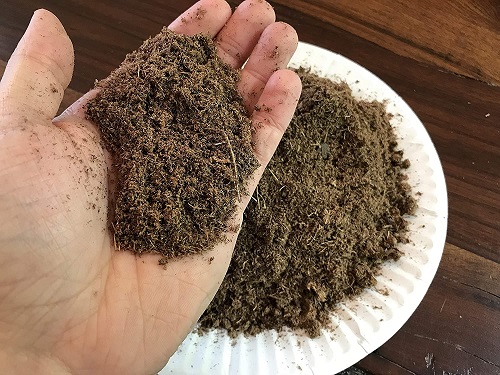
- Peat moss: Provides excellent moisture retention and aeration.
- Perlite: Enhances drainage and aeration by creating air pockets in the mix.
- Orchid bark: Helps to prevent compaction and aids in moisture regulation.
- Coconut coir: Increases water retention and improves soil structure.
- Vermiculite: Improves moisture retention while maintaining good drainage.
Making Anthurium Potting Mix
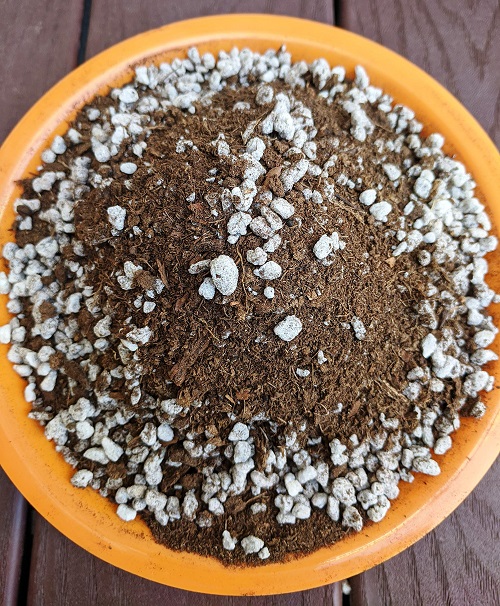
- Start by preparing the base mix. In a large container, combine equal parts peat moss and orchid bark. These ingredients form the foundation of the Anthurium Potting Mix, providing good drainage and aeration.
- Next, add a quarter part of perlite to the base mix. Perlite is an essential ingredient as it improves drainage and allows air circulation within the mix. Mix these ingredients thoroughly to ensure even distribution.
- Incorporate a quarter part of coconut coir to the mix. Coconut coir acts as a natural and sustainable alternative to peat moss, offering excellent water retention properties while improving soil structure. Blend it well with the other ingredients.
- Finally, add a small portion (about 10%) of vermiculite to the mix. Vermiculite aids in moisture retention, ensuring that the roots have access to adequate water without risking waterlogging. Mix the vermiculite evenly throughout the potting mix.
- Once all the ingredients are thoroughly combined, your Anthurium potting mix is ready to use! Transfer it to a clean, sterilized container or store it in an airtight bag until needed.
Tips for Using the Anthurium Potting Mix
Creating an Anthurium potting mix that meets the specific needs of these tropical plants is a crucial step in ensuring their health and growth. By combining the right ingredients in the proper proportions, you can provide your Anthuriums with a well-draining, aerated, and nutrient-rich growing medium.
Additionally, peat moss and orchid bark form the base, offering good drainage and aeration, while the perlite creates air pockets and enhances drainage further. Coconut coir contributes to water retention and soil structure improvement, and vermiculite helps retain moisture without waterlogging the roots.
When using the Anthurium potting mix, make sure your plant containers have proper drainage holes to prevent water accumulation. Before potting your Anthurium, gently loosen the roots to promote healthy growth. Additionally, choose a container that allows some room for the roots to expand without being excessively large.
Once potted, water your Anthurium thoroughly, allowing excess water to drain out. Avoid leaving the plant sitting in standing water, as this can lead to root rot. Additionally, regularly fertilize your Anthurium with a balanced, water-soluble fertilizer to provide essential nutrients for robust growth and vibrant blooms.
Some Additional Tips
- Remember that Anthuriums are tropical plants that thrive in warm and humid environments. Additionally, place them in an area with bright, indirect light, and maintain a consistent temperature between 15°C to 29°C (60°F and 85°F). Mist the leaves occasionally to create a humid atmosphere, especially if you live in a dry climate.
- Inspect your Anthurium regularly for signs of pests or diseases. Common issues include aphids, mealybugs, and fungal infections. Promptly address any problems by using organic insecticides or fungicides, or by manually removing pests.
- Repotting is typically required every two to three years or when the plant outgrows its current container. Additionally, during the repotting process, replace the old potting mix with fresh mix, ensuring the new container has adequate drainage.
- Provide adequate humidity by misting the leaves with water or placing a tray of water near the plant.
- Fertilize the anthurium every 2-4 weeks during the growing season using a balanced, water-soluble fertilizer.
How to Plant Anthurium in Pots
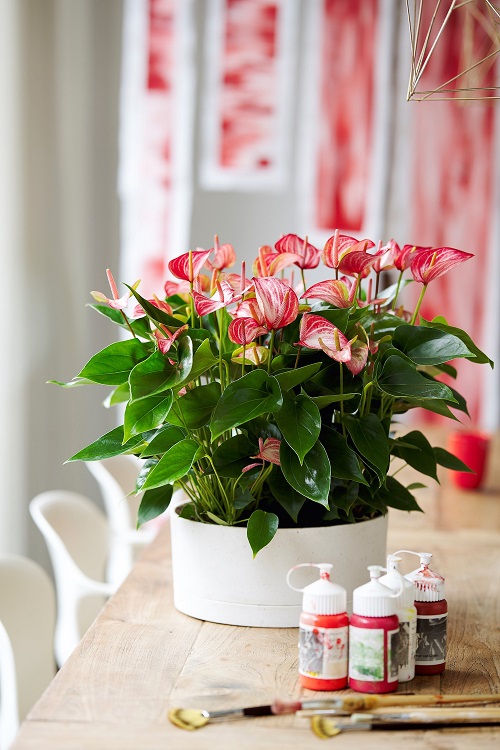
If you’re interested in adding the vibrant beauty of anthuriums to your indoor or outdoor space, planting them in pots is an excellent option. Anthuriums, with their heart-shaped flowers and glossy green leaves, make for captivating additions to any plant collection. Follow these steps to growing anthuriums in pots:
1. Choosing the Right Anthurium Pot Size
When selecting a pot for your anthurium, it’s crucial to consider its size. For young anthurium plants, a pot with a diameter of 6 to 8 inches (15 to 20 cm) is generally suitable. As the plant grows, it will eventually require a larger pot, ranging from 10 to 14 inches (25 to 35 cm) in diameter. Choosing the right pot size allows for proper root development and prevents waterlogging.
2. Preparing the Potting Mix
Anthuriums thrive in a well-draining potting mix that retains some moisture while preventing water accumulation. Create a suitable mix by combining equal parts peat moss, perlite, and orchid bark. This mixture provides excellent drainage, promotes healthy root growth, and supports overall plant health.
3. Growing Anthuriums in Pots
- Fill the pot halfway with the prepared potting mix.
- Carefully remove the anthurium from its nursery container, taking care not to damage the roots.
- Place the plant in the center of the pot and fill the remaining space with the potting mix, gently firming it around the roots.
- Water the newly potted anthurium thoroughly until excess water drains out of the pot’s drainage holes.
- Position the pot in a well-lit area with bright, indirect light. Avoid placing it in direct sunlight, as it may scorch the leaves.
- Maintain regular watering, allowing the top inch (2.5 cm) of the soil to dry out between watering sessions. Anthuriums prefer slightly moist soil but can suffer from overwatering.
By following these steps, you can confidently plant anthuriums in pots and enjoy their captivating beauty in your home or garden. Remember to choose the appropriate pot size, prepare a well-draining potting mix, and provide the right lighting and watering conditions. With proper care and attention, your potted anthuriums will thrive and reward you with their stunning blooms.
- Like
- Digg
- Del
- Tumblr
- VKontakte
- Flattr
- Buffer
- Love This
- Odnoklassniki
- Meneame
- Blogger
- Amazon
- Yahoo Mail
- Gmail
- AOL
- Newsvine
- HackerNews
- Evernote
- MySpace
- Mail.ru
- Viadeo
- Line
- Comments
- Yummly
- SMS
- Viber
- Telegram
- Subscribe
- Skype
- Facebook Messenger
- Kakao
- LiveJournal
- Yammer
- Edgar
- Fintel
- Mix
- Instapaper
- Copy Link