- Like
- Digg
- Del
- Tumblr
- VKontakte
- Flattr
- Buffer
- Love This
- Odnoklassniki
- Meneame
- Blogger
- Amazon
- Yahoo Mail
- Gmail
- AOL
- Newsvine
- HackerNews
- Evernote
- MySpace
- Mail.ru
- Viadeo
- Line
- Comments
- Yummly
- SMS
- Viber
- Telegram
- Subscribe
- Skype
- Facebook Messenger
- Kakao
- LiveJournal
- Yammer
- Edgar
- Fintel
- Mix
- Instapaper
- Copy Link
Hari Mirch is a staple in Indian kitchens, and growing it in pots in your balcony is the best way to harvest it fresh and for free! Know all the details!
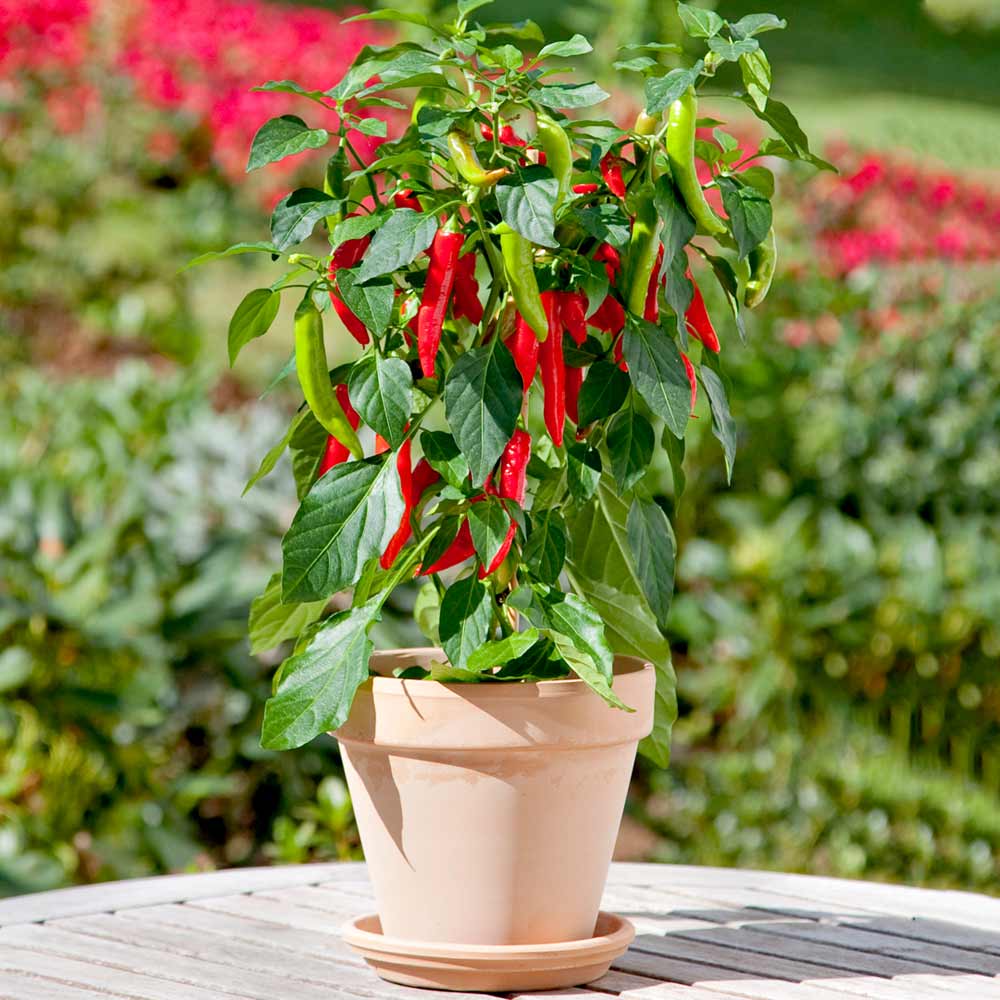
Hari Mirch is one of the easiest plants you can grow in a small space. If you live in an apartment, then growing it on a windowsill or balcony is very simple!
Have a look at the best chili growing tips here
Hari Mirch Information
The hari mirch in English is popular as Chili pepper. Apart from adding heat to the dishes, these are quite popular to add an extra tadka or taste to cuisines. Indian meals are incomplete without them, so it makes sense to grow them at home!
Check Out the Best Vegetable Plants for Balcony in India here!
Difference Between Hari Mirch and Lal Mirch

- Lal Mirch is actually Hari Mirch, which turns red with age or when it dries up. They lose water content and a significant chunk of nutrients with time.
- Lal Mirch is more popular in its powder form and also adds that red color to the meals.
- Hari Mirch has a higher water content than Lal Mirch.
- Eating Lal Mirch excessively is not good as it can cause stomach problems, leading to peptic ulcers or even stomach cancer. However, Hari Mirchi doesn’t cause so much damage in comparison.
Growing Hari Mirch
Purchasing fresh seeds from the nursery is best to grow these spicy treats.
- Sow seeds in a well-draining potting mix.
- Water well and keep the pot where it gets plenty of sunlight.
- The seeds will germinate in 2-3 weeks.
- The plant will be ready to harvest within 60-90 days.
Requirements to Grow Hari Mirch

Sunlight
To grow Hari Mirch at home, choose a spot that receives a minimum of 5-6 hours of sunlight daily. The more sun the plant will get, the better it will be for its growth and the number of chilies. Do not keep the pot in a shady area, as it will make the hari mirch plant leggy.
Soil
Amend the regular garden soil with plenty of organic matter, coco peat, vermicompost, and a handful of cow dung manure at the planting time. This will give the hari mirch plant all the boost it needs for the best growth.
Learn How to Make Potting Soil at Home in India here!
Water
Water Hari Mirch plant when the topsoil feels slightly dry to the touch. Ensure you never let the soil dry completely, and avoid overwatering the plant.
Hari Mirch Care

Fertilizer
Mix tea compost, fruit peelings, or egg shells in the growing medium from time to time. You can also feed the plant with a balanced liquid fertlizer once in 7-9 weeks.
Pests and Diseases
Hari Mirch is relatively safe from pests and diseases in an Indian environment as long as it gets plenty of sunlight and air circulation. Avoid wetting the leaves and overwatering.
Check Out Neem Cake Fertilizer Uses here!
Best Hari Mirchi Preparations in India
Hari Mirch ka Achar

- The first step to preparing Hari Mirch ka Achar is to rinse and dry the Hari Mirch well. Remember that there should be no moisture in them.
- Remove the crowns of Hari Mirch and chop them into 1-inch pieces.
- In a grinder, powder mustard seeds coarsely. Then, add Hari Mirch, ground mustard seeds, and salt to a clean glass jar.
- Mix using a clean spoon. Cover the jar with its lid tightly and keep in the sun for 2 to 3 days. If the sunlight and heat are very intense, then just 1 to 2 days is good.
- After 2 to 3 days, add lemon juice and turmeric powder to the pickle.
- Mix everything very well. Close the jar and keep it in the sun for 1 to 2 days.
- After 1 or 2 days, heat the mustard oil till its smoking point. Let it cool, pour it into the pickle jar, and cover it with its lid. Keep the pickle at room temperature for 4 to 5 days for the pickling process to happen.
- You can keep it for 2 to 3 days at room temperature and then in the fridge.
- Serve it as a side condiment with a simple Indian meal like dal-rice or curd-rice. The pickle can also be served with aloo parathas or chapatis.
Hari Mirch ki Chatni
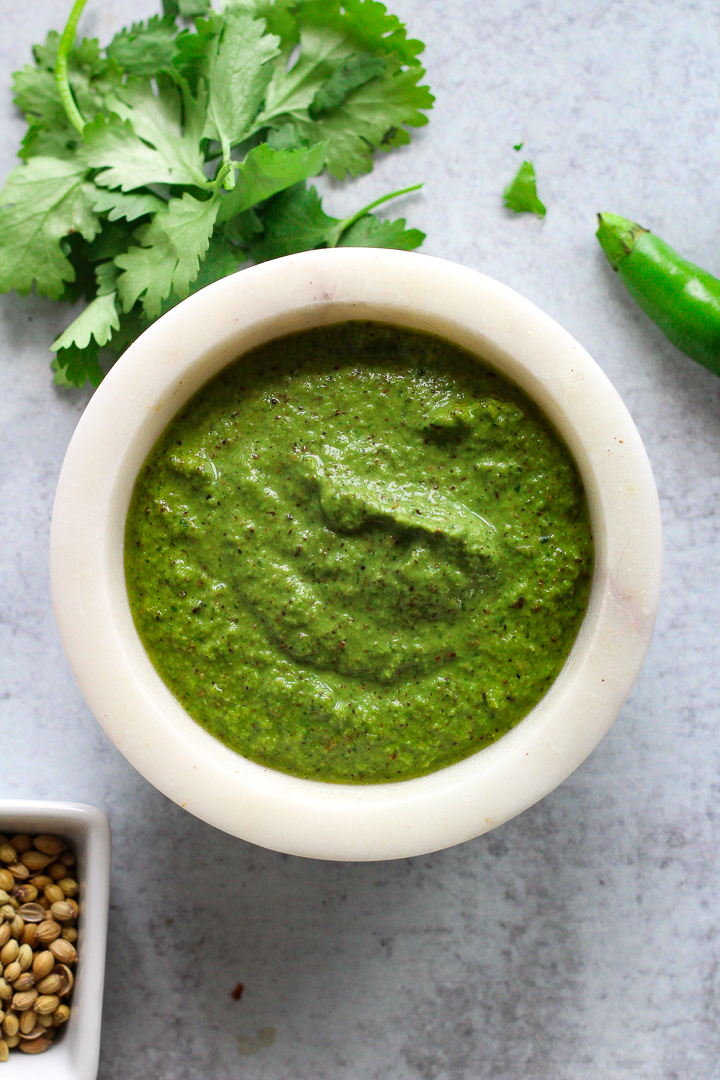
- Heat 1 tablespoon of oil in a pan. Add chana dal and roast over low flame until dal turns light brown or for approximately 1-2 minutes.
- Add curry leaves and chopped green chilies. Sauté for 2 minutes.
- Add grated coconut and ginger and sauté for 1 minute. Remove the pan from heat and let it cool at room temperature.
- To make a medium coarse paste, grind sautéed chili-chana dal mixture, lemon juice, sugar, salt, and water in a mixer.
- Add coriander leaves and grind again to make a smooth paste.
- Transfer the prepared chutney to a serving bowl. Hari Mirchi ki chutney is ready. Serve it as an accompaniment with a meal or a dip with snacks.
Hari Mirch ki Sabji
- To prepare Hari Mirchi ki Sabji, cut the green chili to 1 inch in size after removing the seeds.
- Now heat 3 tsp oil in large Kadai and add 1 tsp cumin, a pinch of hing, and ¼ tsp turmeric. Saute on low flame.
- Further, add chopped chili pieces and saute for 2 minutes or till blisters appear.
- Add in ½ cup besan and roast continuously for 5 minutes. Roast till the raw aroma of besan disappears and turns golden.
- Then, add ½ cup peanut powder, 2 tbsp coconut, ½ tsp garam masala, 1 tsp amchur, and ½ tsp salt. Saute on low flame till the spices turn aromatic.
- Add in 3 tbsp water and mix well. Cover and simmer for 8 minutes or till sabji gets cooked completely.
- Finally, garnish with coriander leaves and serve the Hari Mirchi ki sabzi recipe with rice or chapati.
Learn How to Grow Gilki ki Sabji here!
- Like
- Digg
- Del
- Tumblr
- VKontakte
- Flattr
- Buffer
- Love This
- Odnoklassniki
- Meneame
- Blogger
- Amazon
- Yahoo Mail
- Gmail
- AOL
- Newsvine
- HackerNews
- Evernote
- MySpace
- Mail.ru
- Viadeo
- Line
- Comments
- Yummly
- SMS
- Viber
- Telegram
- Subscribe
- Skype
- Facebook Messenger
- Kakao
- LiveJournal
- Yammer
- Edgar
- Fintel
- Mix
- Instapaper
- Copy Link